Your glucose meter is a vital health partner. It provides essential daily data. Accurate readings guide your diabetes management decisions. An uncalibrated meter gives misleading information. This can affect your health outcomes significantly.
Calibration aligns your meter with a known standard. It ensures your results reflect reality. This process is simpler than many people think. Learning proper technique brings peace of mind. Your confidence in each reading will grow.
Understanding Why Calibration Matters
Calibration confirms your meter’s measurement accuracy. Think of it like tuning a musical instrument. Even the best glucometer can drift over time. Regular calibration corrects these small variations. It maintains the device’s precision.
Manufacturers design meters for specific test strips. Calibration synchronizes these two components. This synergy produces reliable blood glucose readings. Without it your results could be dangerously wrong. Proper calibration is a non-negotiable practice.
Pre-Calibration Checklist
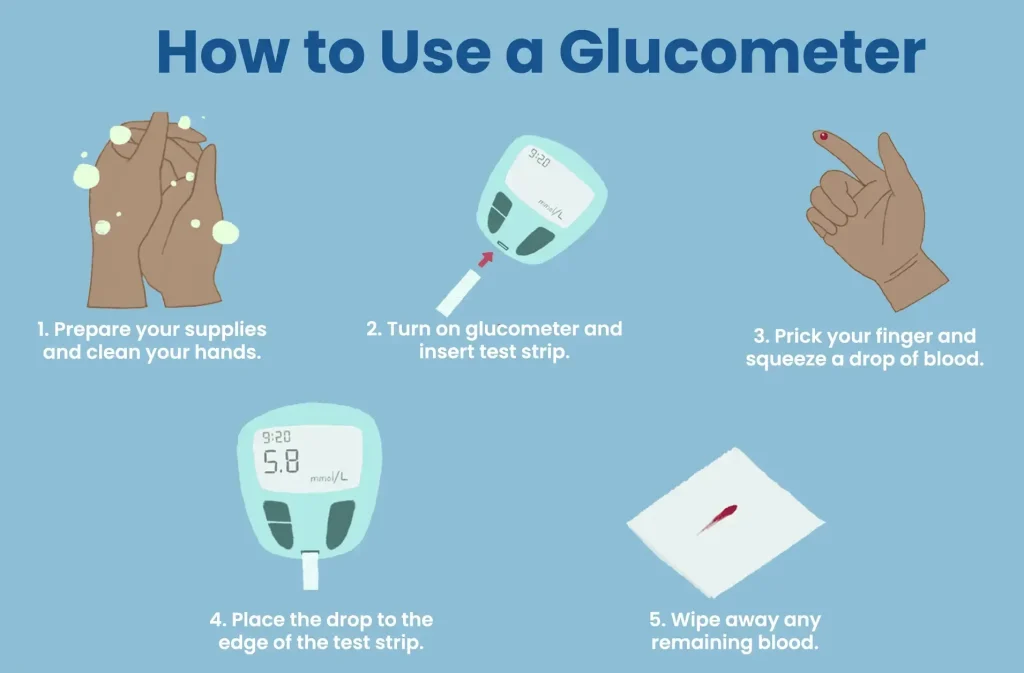
Begin with proper hand hygiene. Wash your hands thoroughly with soap. Dry them completely with a clean towel. Do not use alcohol swabs before testing. Alcohol can skew blood sugar readings.
Gather your complete glucose meter kit. You will need the meter itself. Have your specific test strips ready. Ensure control solution is available and not expired. Find a clean well-lit workspace. Check the test strip expiration date carefully.
The Control Solution Method
Control solution is a liquid with known glucose levels. It mimics blood for testing purposes. Every glucose meter kit includes this solution. Some kits provide both high and low solutions.
Insert a test strip into your meter. Apply the control solution instead of blood. Use the amount specified in your manual. Wait for the result to appear on screen. Compare this number to the expected range.
Interpreting Control Solution Results
Your meter’s manual lists acceptable ranges. These are printed on the test strip vial. Your result should fall within this specified range. This indicates your system is working correctly.
A result outside the range signals trouble. Your meter may need recalibration. The test strips could be compromised. The control solution might be expired. Repeat the test to confirm the finding.
When to Perform Calibration
Calibrate when you open a new strip container. This is the most crucial calibration moment. Perform it whenever you suspect inaccurate readings. Calibrate after dropping or damaging your meter.
Do it if your results seem inconsistent with symptoms. Many experts recommend weekly verification. Consistent calibration prevents gradual accuracy drift. It becomes part of your normal routine.
Factors Affecting Glucose Meter Accuracy
Many elements influence your readings. Extreme temperatures damage meters and strips. High humidity can compromise test strip integrity. Dirty meters produce unreliable results.
Old test strips frequently give wrong readings. Insufficient blood samples cause errors too. Some medications interfere with glucose monitoring. Understanding these factors improves your technique.
Choosing Reliable Equipment
Selecting the best glucose meter is important. Look for models with simple calibration processes. Consider devices with automatic calibration features. Read independent reviews about meter accuracy.
The most accurate blood glucose meter for you fits your lifestyle. Some meters require less frequent calibration. Others offer advanced quality checks. Your diabetes educator can recommend suitable options.
Advanced Monitoring Technologies
New technologies are changing glucose monitoring. Continuous glucose monitors use sensor technology. Some systems require minimal fingerstick calibration. Glucose monitor patches offer constant readings.
These systems still need verification against blood tests. Understanding their calibration needs is different. Traditional meter principles still apply fundamentally. Technology enhances but doesn’t replace proper practice.
Troubleshooting Common Calibration Issues
Sometimes calibration produces unexpected results. First check your control solution expiration date. Old solution loses its precise concentration. Ensure you are using the correct solution type.
Verify your test strips are compatible. Different meters need specific strip designs. Make sure your meter is clean and undamaged. Repeat the process with fresh materials.
Creating a Calibration Habit
Incorporate calibration into your diabetes care routine. Keep a log of your control tests. Note the date and results each time. This creates a valuable accuracy history.
Set calendar reminders for monthly checks. Place your control solution with your meter. Visibility reminds you to perform regular verification. Good habits ensure long-term monitoring success.
When to Seek Professional Help
Sometimes home calibration isn’t enough. Contact your diabetes educator for guidance. They can demonstrate proper technique. They might test your meter against lab equipment.
Your pharmacist can also verify meter performance. They often have specialized testing devices. Don’t hesitate to replace persistently problematic equipment. Your health deserves reliable tools.
The Confidence of Accuracy
Proper calibration transforms your diabetes management. It turns anxiety into assurance. Each reading becomes a trustworthy data point. Your treatment decisions gain solid foundation.
This simple practice protects your wellbeing. It ensures your daily efforts are properly guided. Take control through consistent calibration habits. Your health journey deserves nothing less.
FAQ’s
How often does Medicare pay for a new glucometer?
Medicare typically replaces meters every five years. They may cover one sooner if medically necessary. Your doctor must provide documentation for early replacement.
Where can I find the best glucose meter with cheapest strips?
Some online brands offer affordable strips. Compare strip prices before selecting a meter. Online pharmacies frequently provide competitive pricing.
Is there a truly no stick glucose meter available?
Continuous glucose monitors reduce fingersticks significantly. They still require occasional calibrations. The FreeStyle Libre is a popular sensor-based option.
Does Medicare cover no stick glucose monitors?
Yes Medicare often covers CGMs for qualifying patients. You must meet specific diabetes management criteria. Your doctor can submit the necessary paperwork.
What affects glucose meter strip costs?
Insurance coverage greatly influences final prices. Generic strip versions cost less than brands. Buying in bulk often reduces per-strip costs.
Why is calibrating monitoring devices important?
Calibration ensures your readings are accurate. It aligns your meter with a known standard. This prevents misleading health data.
What affects Glucose Meter Accuracy most?
Extreme temperatures and humidity damage accuracy. Old test strips give wrong readings. Dirty meters produce unreliable results.
How often should I check my meter’s accuracy?
Test with control solution weekly. Always calibrate when opening new strips. Verify after dropping your meter.
Can medication affect glucose readings?
Some medicines interfere with meter accuracy. Always discuss medications with your doctor. This helps identify potential conflicts.
What does control solution actually test?
It verifies your entire system’s accuracy. This includes both meter and strips. The solution has known glucose levels.